Zendesk
Zendesk being a prominent Customer Service tool works great as channel to mine the product love out of your customers. A Zendesk-GrowthScore integration helps you capitalize on the customers who are happy.
This is done by forging a handshake between Zendesk & GrowthScore, wherein every time customers give feedback that they liked your customer service i.e. Customer Satisfaction (CSAT) = “Good”, that particular contact is automatically added to the audience for your Reviews and/or Testimonials campaign.
Here is a quick setup guide for this integration.
Salient Highlights:
- In the Settings section – under Extensions, we define an HTTP Target to send the above identified customer data to GrowthScore
- Next, we define a Trigger in the Business Rules section under Admin tab
- This Trigger will identify all those customers who cited their interaction as “Good”
- We would also configure an Action for the Trigger to send the data of customres thus identified to be sent to the HTTP Target we defined earlier.
Let see how we can configure this on Zendesk.
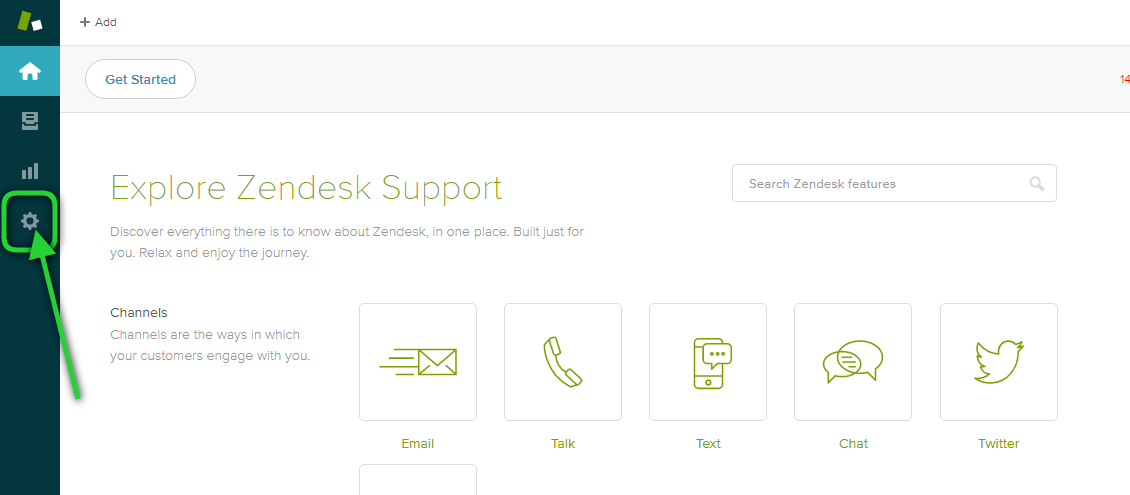
Navigate to Admin Panel
As shown in the image below, login to your Zendesk dashboard & navigate to the Admin Panel, depicted as single cog as the bottom-most icon on the menu
Defining a Target
The foremost step is to define a Target for the data to be received when triggered or sent from Zendesk. This implies creating an HTTP Target for Zendesk’s reference.
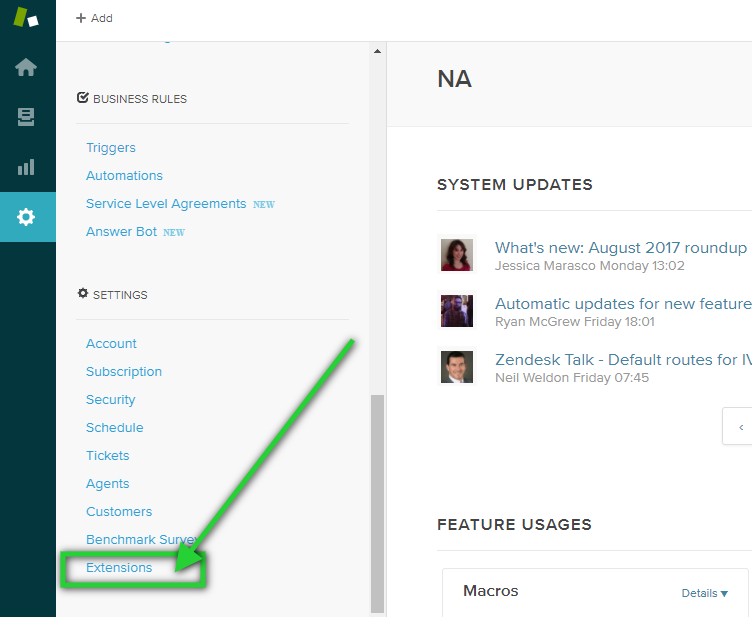
Go to Extensions
Scroll down to the Settings section on the side panel and navigate to Extensions, as shown in the below image.
Add Target
Here we will define an HTTP Target, which is basically an endpoint on GrowthScore for receiving the customer contact data from Zendesk – whenever it intercepts a Happy Customer.
Under the Target tab, click on Add Target to create a new HTTP target.

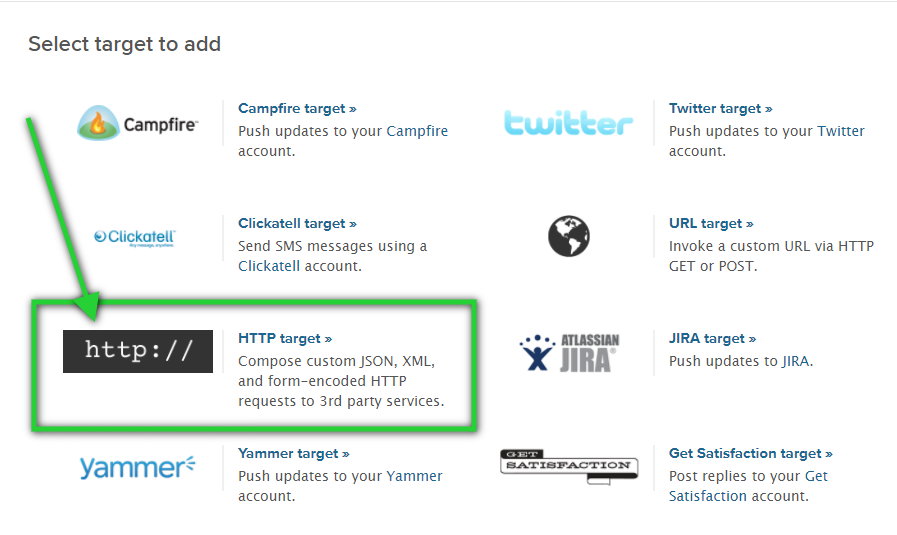
Select HTTP Target
Zendesk allows you to connect to various apps through this method. GrowthScore is not listed amongst them, but we can still achieve the same by defining a HTTP Target.
Go ahead and select ‘HTTP Target’ as shown below.
Define HTTP Target
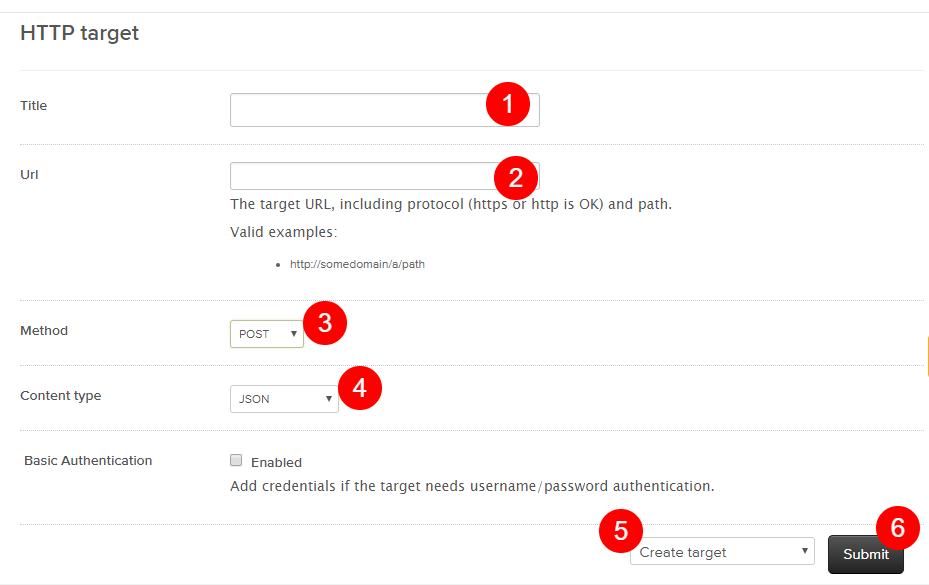
Defining the HTTP Target is a crucial step.
Below steps are numbered and aligned with the numeric labels in the image for your convenience.
- Title: Assign a relatable name to the Target, like GrowthScore Action.
This will help you identify which of the many targets is the one corresponding to the GrowthScore integration with Zendesk. - URL: This is the HTTP target point to be defined.
Zendesk customer data would be delivered to this particular URL.
The URL would have your GrowthScore Auth Key appended in the end – for the sake of authentication & secure exchange of data.
Set the URL as:
https://api.growthscore.io/v1/createcontact?Auth-GSKey=YOUR_AUTH_KEY
You must replace the wildcard ‘YOUR_AUTH_KEY’ with your Growth Score Auth Key.
<?? How can I find my Auth Key ??>
- Method: Set this as POST
This HTTP Target defined is the receiver for the data being sent from Zendesk – hence we must define the method type as POST. - Content Type: Set content type as JSON
This defines the data type of the info being sent across. We will keep this as JSON. - Set the drop down as ‘Create Target’ to commit the info we’ve provided.
- Click on Submit to create the target.
That completes the defining of your Target. Now let’s proceed to defining the Triggers.
Defining the Triggers
Once the target has been defined, as done previously, we must define the Triggers for which Zendesk shall send across the customer data. This is similar to defining a few business rules on Zendesk.
Go to Triggers
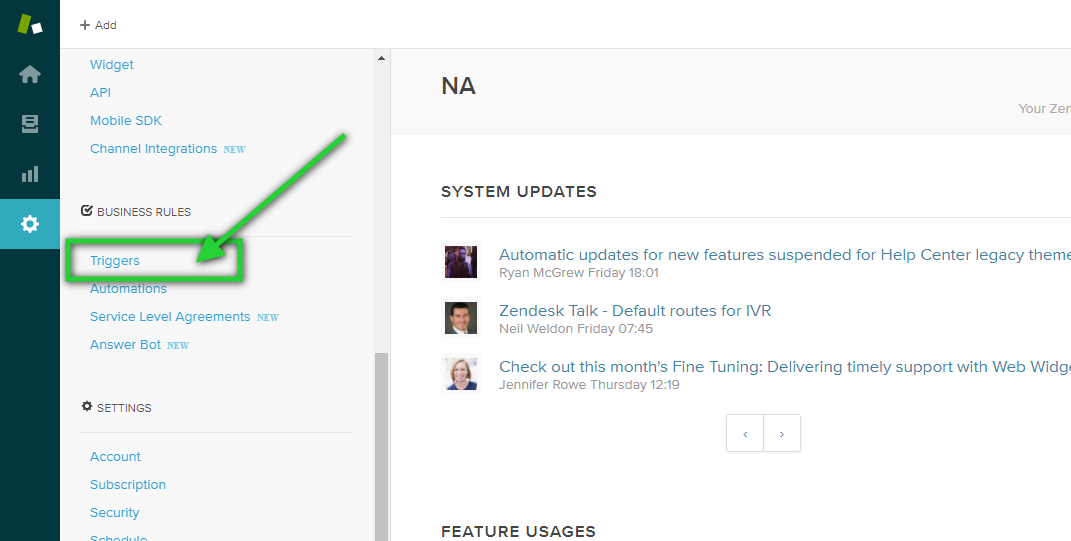
On the side panel, scroll down to the Business Rules section.
The foremost option to define Business Rules is using Triggers.
Click on it to navigate to the same.
We will define the Trigger parameters in the very next step.
Add Trigger
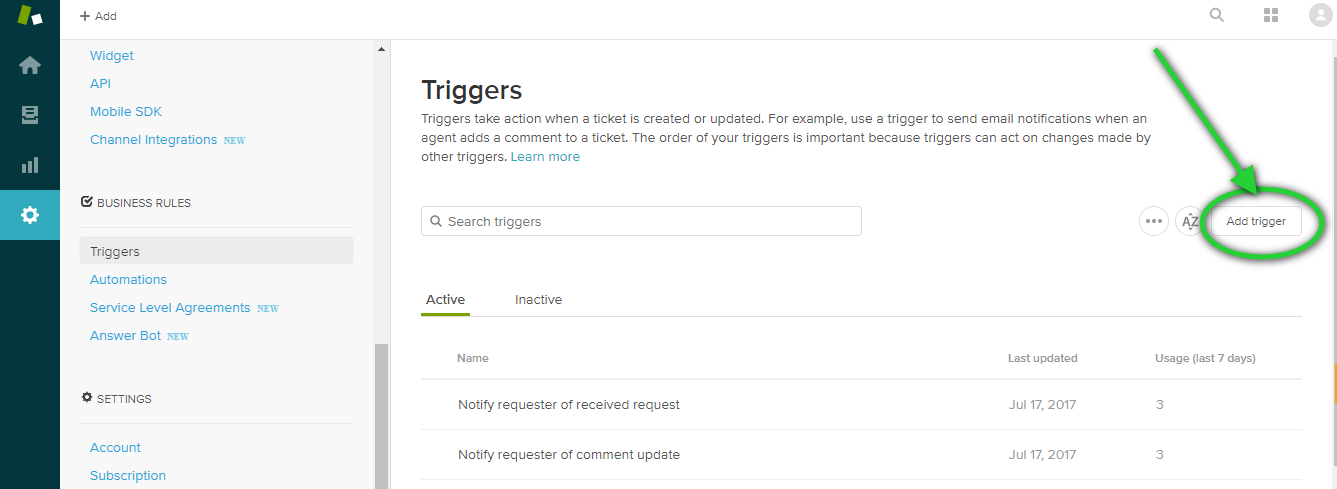
When you navigate to Triggers, you may find a few triggers predefined.
Ignore the same and proceed to add a new Trigger simply by clicking the Add Triggerbutton.
Set a Trigger Name
Define an easy to identify/relate name for the Trigger. You may also add a description.

Set Conditions for Trigger
Under the Conditions section, you need to set two conditions.
Zendesk records & classifies feedback on Customer Support interaction as “with comments” and “without”.
Additionally, the conditions are classified under two variants: Meet ALL and Meet ANY. Defining conditions under Meet ANY makes best sense for our use case, since we would be importing all contacts that have cited the interaction as Good, which includes Good with comments too.
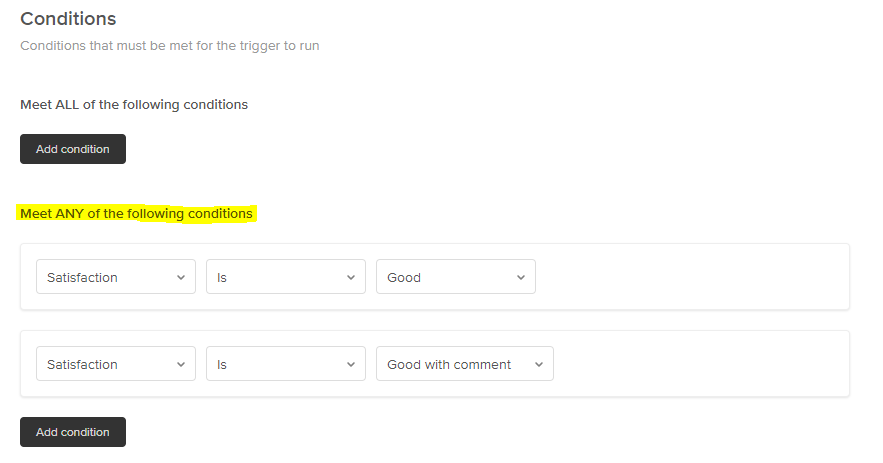
So, set the TWO conditions as –
Satisfaction (ticket property) IS “Good”
and
Satisfaction (ticket property) IS “Good with comment”
…respectively, under the Meet ANY type condition.
Define Action
The final step in setting up the Trigger is to configure the Action to be taken when the conditions are intercepted.
Click on Add Action and select ‘Notify Target’ from the dropdown.
Now, remember the ‘GrowthScore Action’ we defined as Target in the beginning of this integration activity! (ref: Defining Target)
Map the same target i.e. one defined for GrowthScore (whatever name you may have assigned) to this Action, as shown below.

Next, fill the following code snippet in the JSON body:
{
“emailid”:”{{ticket.requester.email}}”,
“firstname”:”{{ticket.requester.first_name}}”,
“lastname”:”{{ticket.requester.last_name}}”,
“csat”:true
}

Finally, click on Add Action to commit the entries, and Hit Save. This will complete the Zendesk Integration for GrowthScore.
Happy GrowthScoring 😉
We would love your feedback on this article. Let us now how we can improve!