Delighted (using Zapier)
You can now automate the selection of your Happy Customers, i.e. Promoters – with a quick zap (Thanks to Zapier) between Delighted & GrowthScore.
This one time setup will ensure that every time a Promoter is encountered on your Delighted initiated NPS survey, the contact details (along with their NPS score & text) would be forwarded to GrowthScore automatically.
GrowthScore will thereafter take care of the review or testimonial request as per the campaigns defined on your dashboard.
Sweet, right! Let’s get started..
GrowthScore Zaps are still in Beta on Zapier!
So, follow the below Invitation Link to set up a GrowthScore Zap…
You will encounter a page similar to one shown below. Login to Zapier with your credentials to accept the Invite & Start using it.
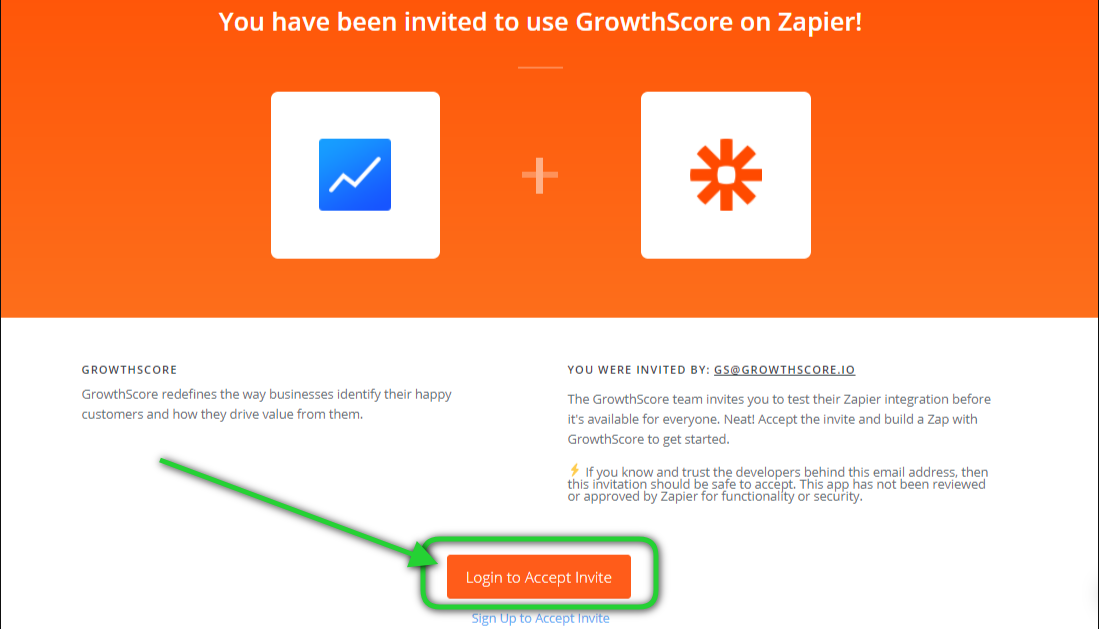
If you do not have a Zapier account, we recommend you sign up with them & create one. You can only proceed if you have an active Zapier account.
Once you’ve logged in, you may only have to

Click on Create this Zap to proceed.
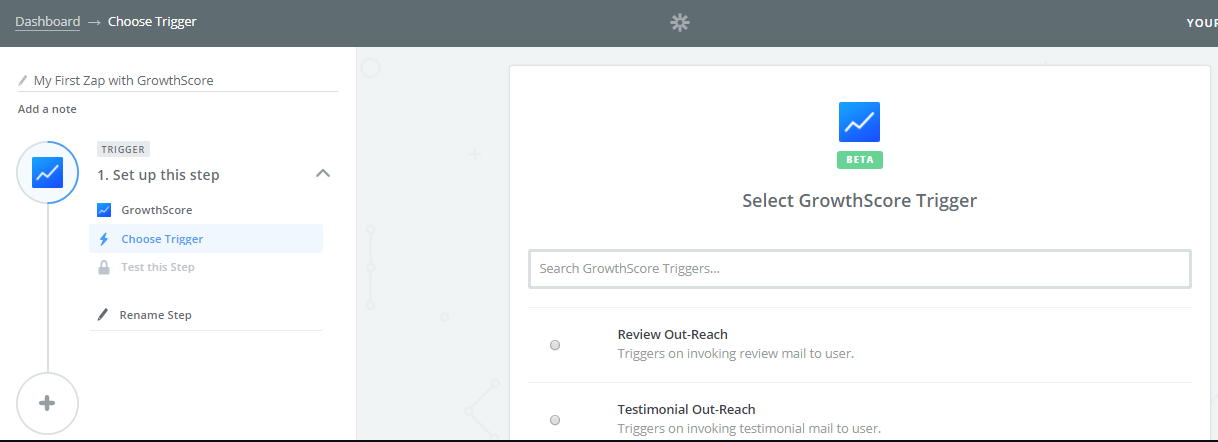
Now, your zap editor will feature GrowthScore as the 1st step in the Zap.
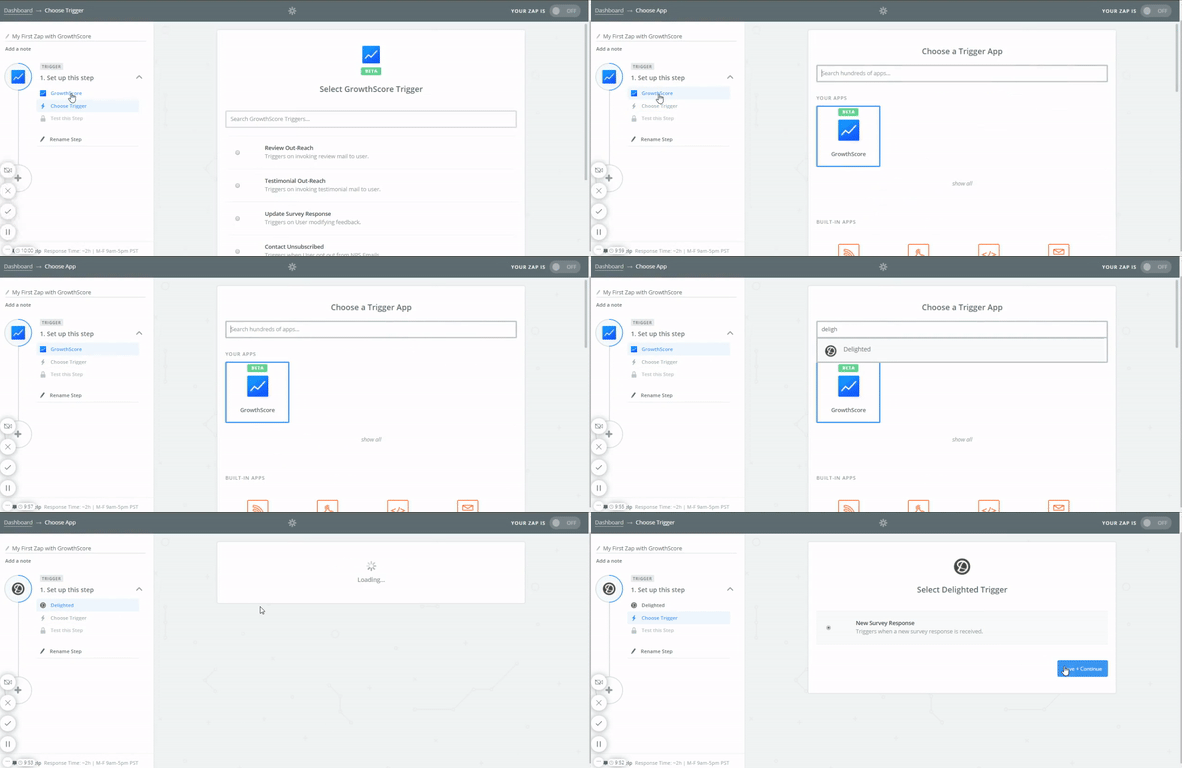
However, we’ll be needing you to import data from Delighted & set up an action on GrowthScore. So, go ahead and change the App in the 1st step to Delighted, as shown in below GIF image.
Prepare Delighted for the Zap Trigger
The NPS data for Promoters shall be imported from Delighted. This will requires us to:
- Choose Delighted as the Trigger app (which we’ve already done!)
- Define the Trigger as New Survey Response
- Connect your Delighted account with Zapier
- Test the connection & lock it in.
Choose Trigger as New Survey Response
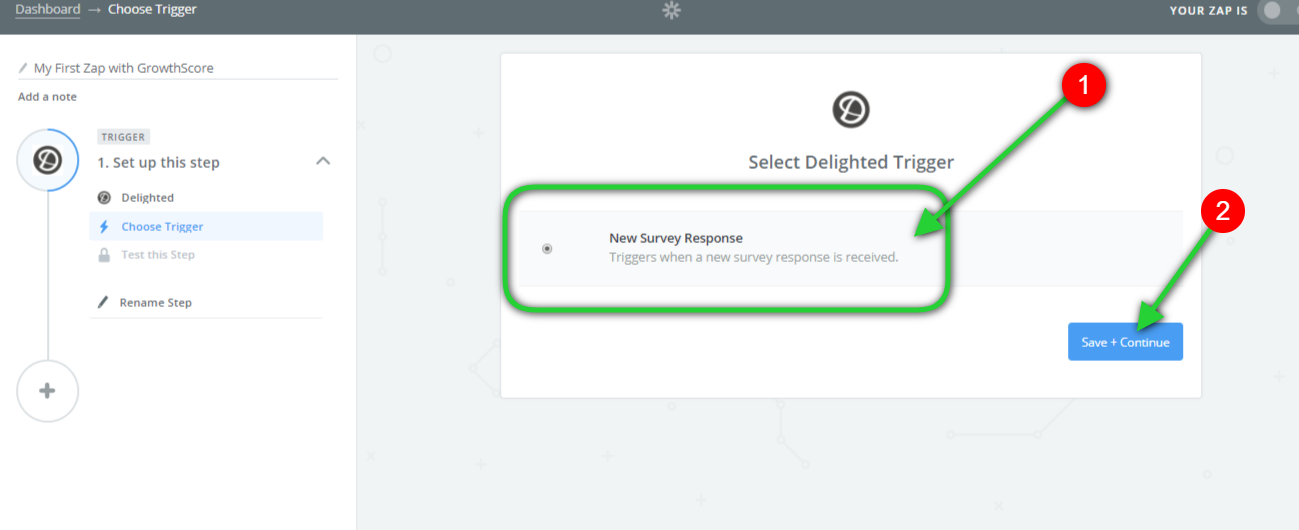
Select New Survey Response as the trigger for data exchange between Delighted & GrowthScore. Once selected, Save & Continue.
Connect your Delighted Account
Follow the instruction given in the following link to connect your Delighted Account with Zapier:
Connecting Delighted Account with Zapier
Test Delighted
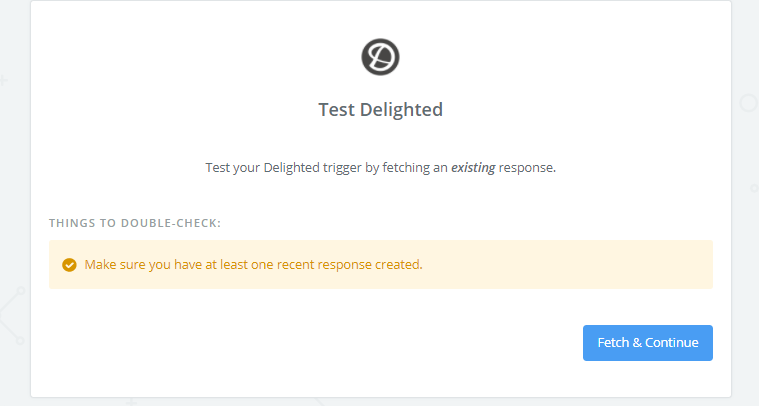
Zapier will implore you to test the trigger you just setup, by fetching an existing promoter.
Click on Fetch & Continue to do the same.
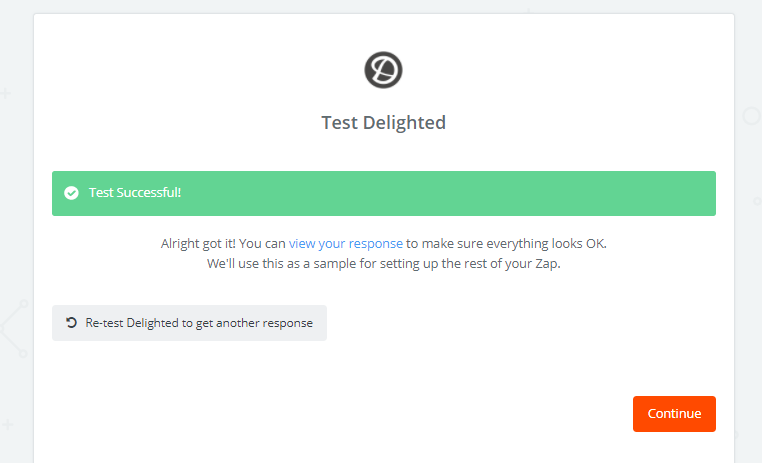
On success, you can proceed to connect GrowthScore next. Click on Continue.
Set up GrowthScore for Zap Action
Now that we’ve configured Delighted’s trigger, we will proceed to set up your GrowthScore with Zapier.
This will involve:
- Connect your GrowthScore account with Zapier
- Choose the Action to be taken by GrowthScore
- Set up the Template for passing data to GrowthScore
- Test the Step & Lock-in the Zap
Connect GrowthScore with Zapier
To connect GrowthScore with Zapier:
Step 1
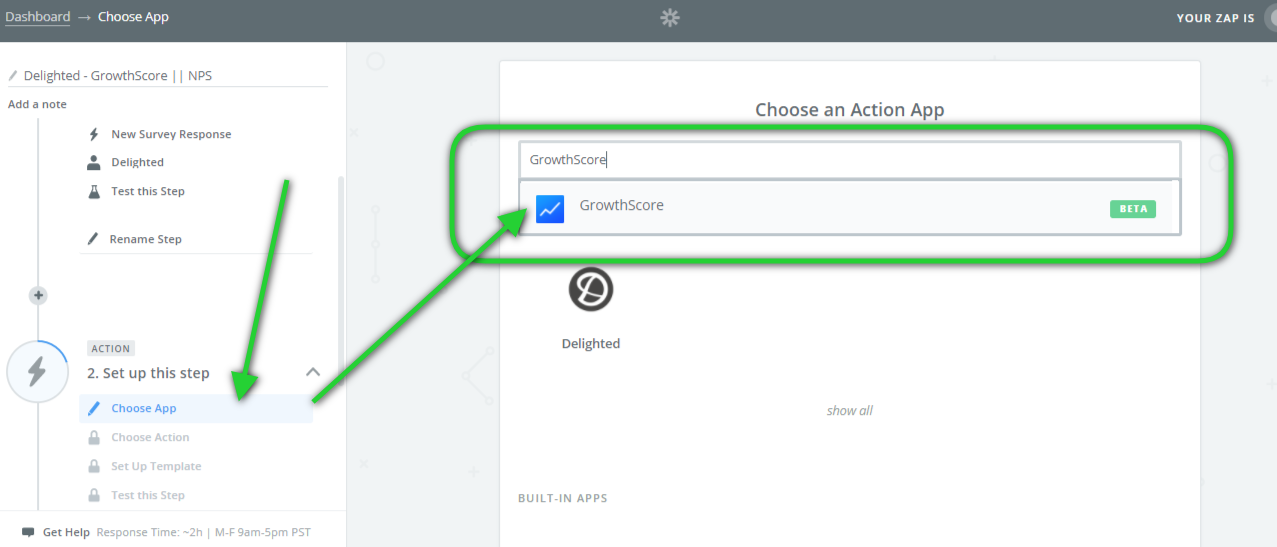
Search for GrowthScore in the search bar, and click on the suggested app as shown.
Step 2
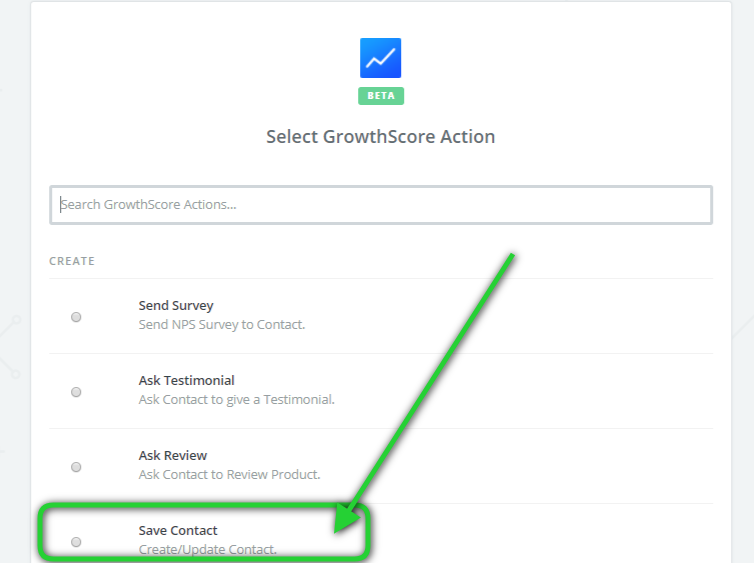
Select GrowthScore Action as Save Contact, followed by Save + Continue
Step 3
Now you will be asked to Connect an Account with Zapier for your GrowthScore action.
Click on the button and you will encounter a pop-up asking for your GrowthScore API Key.
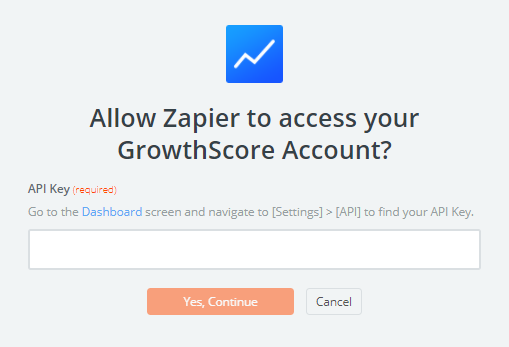
Add your GrowthScore API key here to connect and proceed.
To find your GrowthScore Account API Key, follow the steps mentioned in the below tutorial:
How to get my GrowthScore API Key
Map Data between Delighted & GrowthScore
Now the most important step is to map the relevant data between Delighted & GrowthScore.
Here you will encounter a template for the parameters GrowthScore would accept from external sources, as shown.
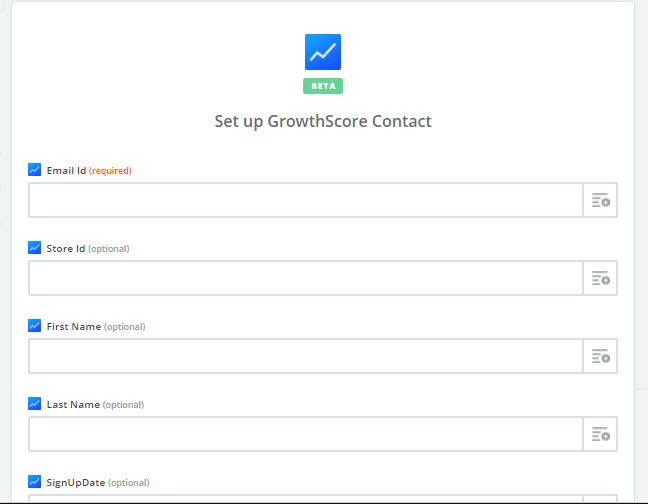
We will handle this in steps.
Note that email ID is a mandatory parameter in this connection.
Each field has a dropdown that will let you map incoming data from Delighted.
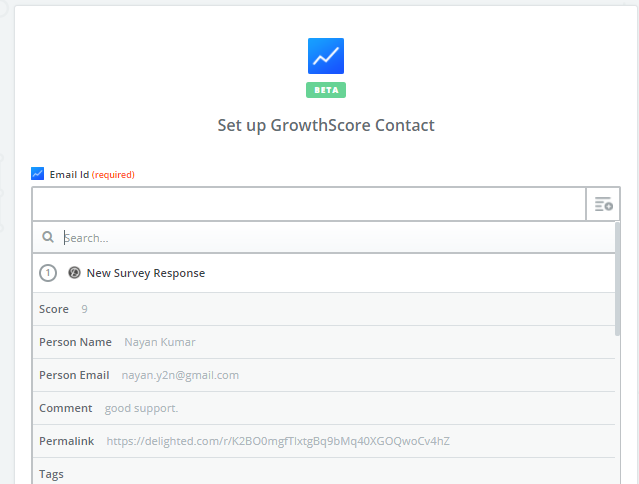
Email ID
From the drop down select Person Email (Delighted param) as the value to be mapped to Email ID (GrowthScore param), as shown.

First Name
Similarly as above, First Name (GrowthScore param) will be mapped with Person Name (Delighted param)

NPS
NPS will be mapped with Score (Delighted param)

Other Attributes
There a few other fields you may choose to map additionally. You can feel free to use the Attributes param to map any desired field from Delighted that is of relevance to you, as shown below.

We recommend you to also populate the Source (GrowthScore param) field with the name of the connecting app, i.e. AsKNicely in this case. This will help you segment & keep track of your customer responses better.
Once done, click Continue to proceed.
Test & Lock-in Zap
Now you can test the connection by allowing the zap to create a contact, for the Delighted data received, on GrowthScore.
Once done, you can click on Finish to lock-in the zap.

Do not forget to Turn ON the Zap before you start using it.
Happy GrowthScoring 😉
